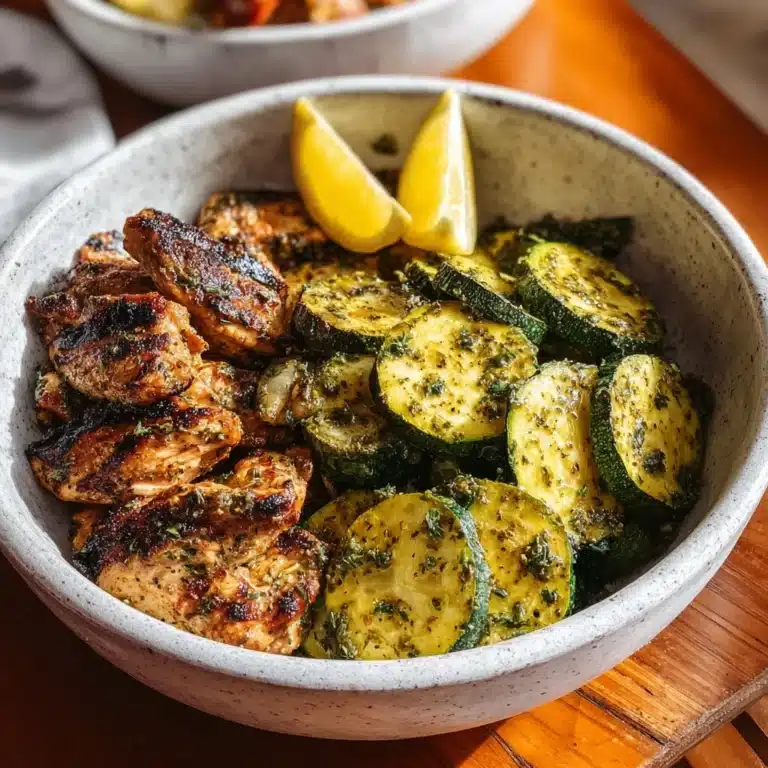
I absolutely love a good crispy chicken dish, and this Fried Chicken Breast (Crispy and Easy Pan-Fried Recipe) Recipe has become one of my all-time favorites. It’s got that perfect crunchy coating that stays crisp without being greasy, while the chicken inside remains juicy and tender. Every time I make it, I’m amazed at how simple ingredients and a straightforward process turn into such a delicious feast that my whole family devours eagerly. If you’re looking for that go-to pan-fried chicken recipe that delivers big on flavor and texture, I promise this one won’t disappoint.
Why You’ll Love This Fried Chicken Breast (Crispy and Easy Pan-Fried Recipe) Recipe
What makes this recipe stand out to me is the beautiful balance of bold flavors combined with a satisfyingly crunchy exterior. I love the way the garlic powder, chili powder, and paprika blend in the flour, creating a rich and slightly smoky crust that keeps every bite exciting. The addition of soy sauce and Worcestershire sauce to the egg and milk mixture adds an unexpected depth of savory umami that really elevates the chicken beyond your average fried breast. It feels like a restaurant-quality dish made right in your own kitchen.
I also appreciate how friendly this Fried Chicken Breast (Crispy and Easy Pan-Fried Recipe) Recipe is when it comes to preparation. The use of a Ziploc bag for dredging the chicken is such a clever hack—it saves so much mess and effort, while making sure every piece is perfectly coated. It’s fast enough to whip up on a weeknight but impressive enough to serve at casual gatherings or family dinners. Whether it’s a celebration or just a craving for something crunchy and comforting, this recipe fits every occasion and always gets rave reviews.
Ingredients You’ll Need

To make this fried chicken recipe truly shine, you’ll need a handful of straightforward ingredients that together build texture, flavor, and color. Each one has a purpose, whether it’s the aromatic spices in the flour or the rich hints from the sauces in the egg wash, creating that signature crispy crust and juicy interior.
- Chicken breasts: Boneless, skinless, and cut lengthwise for quicker, even cooking and a tasty crunch ratio.
- All-purpose flour: The base for the crispy coating that locks in moisture and creates that golden crust.
- Garlic powder: Adds a savory kick that complements chicken perfectly.
- Chili powder: Brings just enough warmth and a gentle smoky heat.
- Paprika: Enhances the color and adds subtle sweetness.
- Salt and pepper: Essential seasoning to balance and elevate all the other flavors.
- Milk: Helps tenderize the chicken and forms the base for the egg wash.
- Eggs: Act as the glue for the flour mixture, ensuring the crispy crust sticks beautifully.
- Soy sauce: Infuses a subtle umami richness that makes the coating more complex and flavorful.
- Worcestershire sauce: Adds depth and a slight tang that brightens every bite.
- Oil for frying: Use a neutral oil with a high smoke point to achieve that perfect golden fry without burning.
Directions
Step 1: Combine the flour, garlic powder, chili powder, paprika, salt, and pepper in a large Ziploc bag. Seal it tightly and shake vigorously to make sure all the spices are evenly distributed throughout the flour.
Step 2: Place the trimmed chicken breasts into the bag with the flour mixture. Shake the bag gently but thoroughly, coating every piece evenly with the seasoned flour.
Step 3: In a separate bowl, whisk together the milk, eggs, soy sauce, and Worcestershire sauce until fully combined and smooth. This mixture will create the flavorful coating binder.
Step 4: Remove each piece of the floured chicken from the bag, dip it fully into the egg mixture, then immediately return it to the flour-filled Ziploc bag for a final coating layer. Shake the bag gently again to cover thoroughly.
Step 5: Heat a few inches of oil in a deep-sided skillet over medium-high heat. You want the oil hot enough to sizzle when you add the chicken but not so hot that it burns the crust before cooking through.
Step 6: Carefully add the coated chicken breasts to the hot oil. Fry evenly, flipping once, until the chicken reaches an internal temperature of at least 165 degrees Fahrenheit and the coating is a deep golden brown—about 4 to 5 minutes per side depending on thickness.
Step 7: Transfer the cooked chicken to a paper towel-lined plate to drain any excess oil before serving. This step is key to keeping the crust crisp and not soggy.
Servings and Timing
This recipe makes about 4 servings, perfect for a family meal or small dinner party. Prep time is roughly 10 minutes, including seasoning and mixing, and cooking time takes about 15 minutes total depending on how hot your oil is and the thickness of your chicken breasts. Altogether, you’re looking at about 25 to 30 minutes from start to finish. Resting the chicken on paper towels for a few minutes after frying lets it cool slightly without losing its crisp texture.
How to Serve This Fried Chicken Breast (Crispy and Easy Pan-Fried Recipe) Recipe

I love serving this pan-fried chicken hot and crispy right off the stove, but it also holds up wonderfully if kept warm in the oven for a little while. It pairs beautifully with classic sides like creamy mashed potatoes, tangy coleslaw, or a crisp green salad with a bright vinaigrette. The lively spice in the coating also shines next to roasted vegetables or buttery corn on the cob for a balanced plate.
For presentation, I like to garnish with a sprinkle of freshly chopped parsley or chives to add a pop of color and freshness. Serving with lemon wedges is another favorite because a little squeeze really brightens all the savory richness and helps cut through the crispy crust.
When it comes to drinks, this dish is incredibly versatile. I enjoy pairing it with a chilled lager or a crisp white wine like Sauvignon Blanc or Pinot Grigio to complement the spice and savoriness. For non-alcoholic options, a sparkling lemonade or iced tea makes for a refreshing match. Whether it’s a casual family dinner or a weekend gathering with friends, this recipe adapts perfectly and always impresses.
Variations
One way I’ve experimented with this recipe is by swapping out the all-purpose flour for gluten-free flour blends or almond flour, making it accessible for gluten-sensitive friends while still maintaining a satisfying crisp. You can also try seasoning the flour differently—adding some cayenne or smoked paprika can add smoky heat, while fresh herbs mixed in the flour make the crust bright and fragrant.
If you want a lighter or healthier twist, I’ve had success baking the coated chicken breasts at 425 degrees Fahrenheit on a wire rack set over a baking sheet. This keeps the crust crispy but cuts down on the oil. For a vegan alternative, substituting the chicken with thick slices of fried tofu or cauliflower steaks and using plant-based milk and egg replacers still delivers a similar crispy-and-flavorful experience.
Another fun variation is to marinate the chicken breasts in buttermilk or yogurt for a few hours before dredging—they come out even juicier and tender, though you’ll want to adjust the seasoning in the flour to balance the tang from the marinade.
Storage and Reheating
Storing Leftovers
If you find yourself with leftovers, I always recommend storing them in an airtight container lined with paper towels to absorb excess moisture. This helps keep the crust from getting soggy. The chicken will stay fresh in the refrigerator for up to 3 to 4 days, making it super convenient for easy lunches or dinners later in the week.
Freezing
This fried chicken freezes well if you want to save some for a longer time. Let the pieces cool completely after frying, then wrap each piece individually in plastic wrap or foil, and place them in a freezer-safe bag or container. They can be frozen for up to 2 months. When you’re ready to enjoy, thaw overnight in the fridge for best texture.
Reheating
To reheat and restore that crispy crust, I find the oven or a toaster oven works best. Preheat to 350 degrees Fahrenheit and place the chicken on a wire rack over a baking sheet to allow air circulation all around. Heat for about 10 to 15 minutes until warmed through and crisped up again. Avoid microwaving if possible, as it tends to make the crust soft and chewy rather than crispy.
FAQs
Can I use chicken thighs instead of chicken breasts?
Absolutely! Chicken thighs have more fat and tend to stay juicier, which some people prefer. Just adjust the frying time slightly since thighs can be thicker and need a bit longer to cook through.
What kind of oil is best for frying?
I recommend using oils with a high smoke point such as vegetable oil, canola oil, or peanut oil. These handle the high frying temperatures without burning and help achieve that crispy, golden crust.
How do I know when the chicken is fully cooked?
The safest and most reliable way is to use a meat thermometer—aim for an internal temperature of 165 degrees Fahrenheit. If you don’t have one, cut into the thickest part and make sure the juices run clear and the meat is white, not pink.
Can I prepare the chicken ahead of time?
Yes, you can coat the chicken and keep it in the fridge for a few hours before frying, which actually helps the coating adhere better. Just cover it well so it doesn’t dry out. However, it’s best to fry right before serving for the crispiest results.
Is this recipe spicy?
This version has a gentle warmth from the chili powder but is not overly spicy. You can easily adjust the heat level by increasing or decreasing the chili powder or adding cayenne pepper for a kick.
Conclusion
If you’re craving a reliably crunchy, flavorful, and satisfying chicken dish, I can’t recommend the Fried Chicken Breast (Crispy and Easy Pan-Fried Recipe) Recipe enough. It’s a recipe that’s both approachable and impressive, perfect for everyday meals or special occasions. I’m confident once you try it, it’ll become one of your trusted staples too. Happy cooking and enjoy every crispy, juicy bite!
Print
Fried Chicken Breast (Crispy and Easy Pan-Fried Recipe) Recipe
This crispy and easy pan-fried chicken breast recipe features boneless skinless chicken breasts double-coated in a seasoned flour and egg mixture, then fried to golden perfection. The flavorful blend of garlic powder, chili powder, and paprika delivers a deliciously crispy exterior with juicy and tender chicken inside, perfect for a quick weeknight dinner.
- Total Time: 30 minutes
- Yield: 4 servings
Ingredients
For the Chicken:
- 3 boneless skinless chicken breasts, cut in half lengthwise
For the Flour Coating:
- 2 cups all purpose flour
- 1 Tbsp garlic powder
- 1 Tbsp chili powder
- 1 tsp paprika
- Salt and pepper to taste
For the Wet Coating:
- 1 cup milk
- 2 large eggs
- 1 Tbsp soy sauce
- 1 Tbsp Worcestershire sauce
For Frying:
- Oil for frying (vegetable or canola oil recommended)
Instructions
- Prepare the seasoned flour mixture: Add the flour, garlic powder, chili powder, paprika, salt, and pepper to a Ziploc bag, seal it, and shake vigorously to combine all ingredients evenly.
- Coat the chicken with flour mixture: Place the chicken pieces into the seasoned flour bag, seal it, and shake well to ensure each piece is thoroughly coated on all sides.
- Mix the wet coating: In a bowl, whisk together the milk, eggs, soy sauce, and Worcestershire sauce until fully blended and smooth.
- Double coat the chicken: Remove the floured chicken pieces from the bag, dip them into the wet coating mixture, and then return them to the seasoned flour bag to coat once again for a crispy, multi-layered crust.
- Heat the frying oil: Pour a few inches of oil into a deep-sided skillet and heat it over medium-high heat until shimmering but not smoking, approximately 350°F (175°C) if using a thermometer.
- Fry the chicken: Carefully place the coated chicken pieces into the hot oil, frying evenly on both sides for about 4-6 minutes per side, or until the chicken reaches an internal temperature of 165°F (74°C) and the coating is golden brown and crispy.
- Drain and serve: Remove the fried chicken from the oil and let it drain on a paper towel-lined plate to absorb excess oil before serving hot.
Notes
- For best results, do not overcrowd the skillet while frying, fry in batches if necessary.
- Using a thermometer ensures the oil is at the correct temperature to achieve a crispy crust without greasy chicken.
- Chicken breasts are pounded to an even thickness for uniform cooking and to prevent dryness.
- Leftovers can be stored in the refrigerator for up to 3 days and reheated in an oven or air fryer to retain crispiness.
- Prep Time: 10 minutes
- Cook Time: 20 minutes
- Category: Main Course
- Method: Frying
- Cuisine: American