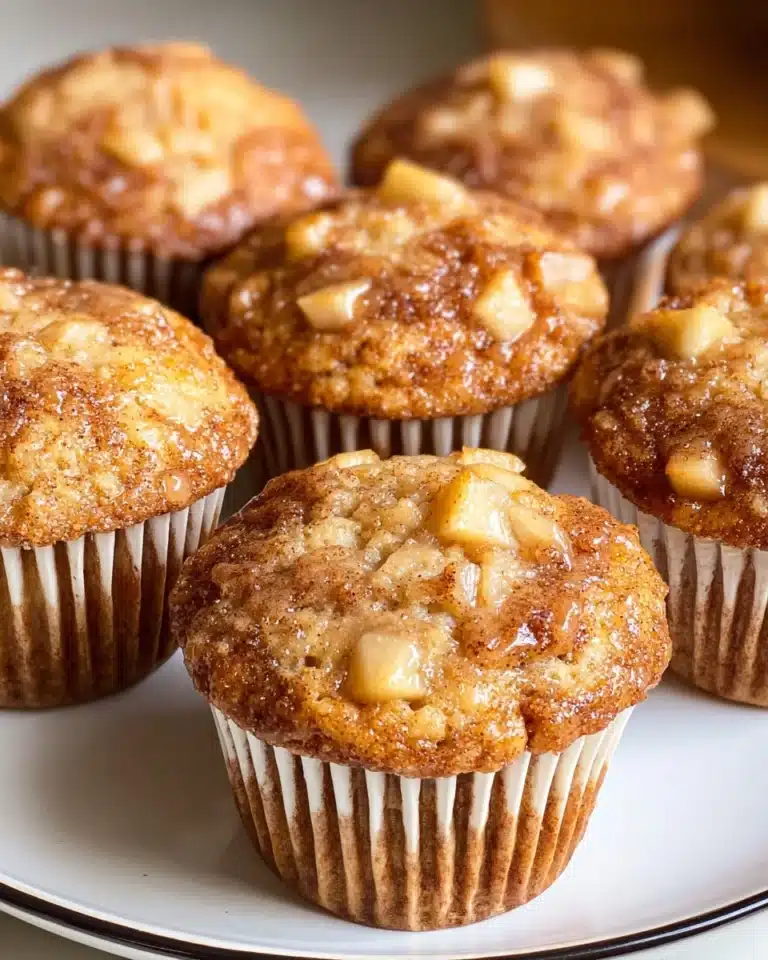
I absolutely love making this Homemade English Muffins Recipe because it transforms a simple breakfast staple into a delightful, fresh-from-the-oven treat. The best part? It requires just one bowl and no kneading, so I can whip up a batch without fuss. Each muffin boasts that perfect chewy texture and a lightly crisp crust dotted with those iconic nooks and crannies that catch all the butter and jam. Once I started making these at home, store-bought muffins just never hit the same anymore!
Why You’ll Love This Homemade English Muffins Recipe
When I first tried this recipe, I couldn’t believe how wonderfully flavorful these muffins turned out with such minimal effort. The delicate balance of a slightly sweet dough paired with a gentle saltiness makes each bite a mouthwatering experience. Plus, the texture is spot on—soft and tender on the inside, with just enough chew and a golden crust that’s lightly dusted with cornmeal. It’s honestly like having a rustic bakery right in my kitchen!
What excites me the most about this recipe is how straightforward it is. With no kneading required, it’s perfect for those days when I want homemade bread but don’t want to spend hours working the dough. The resting times fit nicely into a relaxed morning routine, and the cooking technique on the stove before baking helps lock in that classic English muffin texture. Whether it’s weekend brunch, a casual family breakfast, or a special occasion, these muffins are always a crowd-pleaser and make any meal feel a bit more special.
Ingredients You’ll Need

These ingredients are simple, pantry staples, but each one plays a key role in delivering that unmistakable flavor and texture of homemade English muffins. I always make sure to use warm water because it helps wake the yeast up and get everything bubbling happily.
- 3 cups all-purpose flour: The base of the dough, providing structure and a soft crumb.
- 1 to 1 1/2 cups warm water: Activates the yeast and hydrates the flour for a tender dough.
- 2 1/4 teaspoons yeast: The magic ingredient that makes the muffins rise and gives them a light texture.
- 1 teaspoon salt: Enhances the flavors and balances the sweetness.
- 2 tablespoons sugar: Adds a subtle sweetness and helps feed the yeast during rising.
- Cornmeal: For dusting the baking sheet, it adds a bit of crunch and prevents sticking.
Directions
Step 1: In a large bowl, combine warm water, yeast, and sugar. Stir gently and let it sit for about 5 minutes or until the mixture becomes foamy—that’s a good sign your yeast is active and ready to go!
Step 2: Add the flour and salt to the yeast mixture. Mix everything together, adding extra water in small amounts if needed until the dough comes together. It should be a bit sticky but manageable. Cover the bowl and let the dough rise for about 1 hour, or until it doubles in size.
Step 3: Sprinkle cornmeal generously onto a baking sheet and set it aside. This will keep the muffins from sticking and give them that classic texture on the bottom.
Step 4: Once the dough has risen, turn it out onto a floured surface. It will still be sticky, so handle it gently. Press the dough into a large circle and cut it into 8 to 12 equal segments.
Step 5: Shape each segment into a ball and place them onto the cornmeal-dusted baking sheet. Cover the balls loosely and allow them to rise again for another 25 to 30 minutes.
Step 6: Preheat your oven to 350°F (175°C). Meanwhile, heat a skillet or large griddle over medium heat.
Step 7: Cook each dough ball on the skillet for about 5 minutes per side. They should develop a lovely golden crust. Transfer the cooked muffins onto a clean baking sheet as you go.
Step 8: Bake the muffins in the oven for 10 to 15 minutes to ensure they’re cooked through and perfectly set. Once done, let them cool slightly before slicing and serving.
Servings and Timing
This recipe makes about 8 English muffins, perfect for sharing or storing for the days ahead. The prep time is about 10 minutes since the mixing is quick, but keep in mind the dough needs 1 hour to rise initially, plus an additional 25 to 30 minutes for the second rise. Cooking on the skillet takes around 10 minutes total, and baking adds another 10 to 15 minutes. All told, you’re looking at about 2 hours from start to finish, but the hands-on time is minimal, making it easy to fit into a relaxed weekend brunch.
How to Serve This Homemade English Muffins Recipe

I love my English muffins fresh and warm, split open with a bit of butter melting right into those nooks and crannies. They’re perfect for breakfast with classic toppings—think scrambled eggs and bacon, or a smear of cream cheese and jam. For a twist, try them with honey and fresh fruit or even avocado and smoked salmon for a light, elegant snack.
Because these muffins have such a lovely texture, I also like to toast any leftovers before serving. That slight extra crunch elevates everything, making even an ordinary morning feel a little more indulgent. I usually arrange them on a wooden board with little bowls of butter, jam, honey, and nut butter to let everyone customize their own. It’s great for family breakfasts or small gatherings.
For drinks, I find a freshly brewed cup of coffee or tea pairs wonderfully, especially with sweeter toppings. On special occasions, I’ve even served warm English muffins alongside a mimosa or a light, fruity white wine to add a festive touch. They’re versatile and always a hit whether on a lazy weekend at home or a special brunch with friends.
Variations
One of the great things about this Homemade English Muffins Recipe is that it’s easy to customize to your taste or dietary needs. If you want to add a little extra flavor, try mixing in some herbs like rosemary or thyme before the first rise. A handful of dried fruit or a sprinkle of cinnamon can also add a lovely touch for more sweetness.
If you’re looking for a gluten-free version, I’ve experimented with gluten-free flour blends and found success by adding a bit of xanthan gum to help with texture. For a vegan twist, simply replace the sugar with a natural sweetener like maple syrup and swap the flour for a plant-based alternative, keeping the yeast and water the same. Cooking times may vary slightly, but the end result remains delicious.
Instead of cooking the muffins on a skillet before baking, some people like to bake them entirely in the oven for a more even crust. That method works well too, but I find the skillet step gives the muffins that classic, slightly crisp “English muffin” surface that really makes them stand out.
Storage and Reheating
Storing Leftovers
Whenever I have leftover muffins, I store them in an airtight container at room temperature if I plan to eat them within a day or two. If you want to keep them longer, the fridge works well too, but remember to bring them back to room temperature or toast them before eating to regain that fresh-baked charm.
Freezing
These muffins freeze beautifully! I like to slice them in half and wrap each one individually in plastic wrap or foil before placing them in a freezer-safe bag. Stored this way, they keep well for up to 3 months. When you want a muffin, just pop it straight from the freezer into the toaster or oven.
Reheating
To get the best texture when reheating, I avoid microwaves since they tend to make the muffins soggy or chewy. Instead, I toast the sliced muffins or warm them in a preheated oven at 350°F (175°C) for about 5 to 7 minutes. If you want that extra bit of crispness, a quick light buttering before heating works wonders. This approach brings back that freshly baked feeling every time.
FAQs
Can I use whole wheat flour instead of all-purpose flour?
Absolutely! Whole wheat flour gives a nuttier flavor and denser texture. I recommend substituting half the all-purpose flour with whole wheat to maintain lightness while adding that wholesome touch.
Why do the muffins need to be cooked on a skillet before baking?
The skillet step creates the signature lightly crisp, golden brown crust and begins cooking the muffins through, ensuring that classic chewy texture. It also helps form the distinctive nooks and crannies inside.
How can I tell if my yeast is still active?
If your yeast mixture becomes foamy and bubbly after sitting in warm water with sugar for 5 minutes, that means the yeast is active. If it doesn’t foam, the yeast might be old or the water temperature wrong, so it’s best to start over with fresh yeast.
Can I make this recipe vegan?
Yes! The recipe is already free from dairy and eggs, making it naturally vegan. Just make sure your sugar is not processed with bone char if you’re strict vegan, and use water that’s comfortably warm.
How should I store homemade English muffins to keep them fresh?
Store them in an airtight container at room temperature for up to 2 days, or freeze them individually wrapped for longer storage. Toast before serving to refresh the texture and flavor.
Conclusion
I can’t recommend this Homemade English Muffins Recipe enough if you want to bring a little bakery magic into your kitchen without any complicated steps. It’s such a satisfying and fun recipe to make, and the delicious results always brighten my mornings. Give it a try—you’ll wonder how you ever lived without your own fresh English muffins!
Print
Homemade English Muffins Recipe
These homemade English muffins are delightfully easy to make with just one bowl and no kneading required. Perfectly soft and chewy with a slightly crisp exterior dusted in cornmeal, they make a fantastic breakfast or side dish that will have you skipping store-bought muffins forever.
- Total Time: 2 hours (including 1 hr 30 min rise time)
- Yield: 8 English muffins
Ingredients
Dry Ingredients
- 3 cups all-purpose flour
- 2 1/4 tsp yeast (active dry yeast)
- 1 tsp salt
- 2 tbsp sugar
- cornmeal (for dusting)
Wet Ingredients
- 1 – 1 1/2 cups warm water
Instructions
- Activate Yeast: In a bowl, combine warm water, yeast, and sugar. Mix well and let sit for about 5 minutes until the mixture becomes foamy, indicating the yeast is activated.
- Make Dough: Add the flour and salt to the yeast mixture. Mix until combined, adding extra water (up to 1/2 cup) as needed to bring the dough together. Cover the bowl and allow the dough to rise for 1 hour or until it has doubled in size.
- Prepare Cornmeal Surface: Pour cornmeal onto a baking sheet and set it aside. This will be used to prevent muffins from sticking.
- Shape Dough: Turn the risen dough out onto a floured surface. The dough will be sticky. Gently press it into a flat circle and cut into 8 to 12 equal segments.
- Form Muffins and Second Rise: Shape each segment into a ball and place them on the cornmeal-dusted baking sheet. Cover the dough balls and let them rise for an additional 25-30 minutes.
- Preheat Oven and Skillet: Preheat your oven to 350°F (175°C). Heat a skillet or large griddle over medium heat.
- Cook on Skillet: Place the dough balls (flattened slightly) onto the skillet and cook for about 5 minutes on each side until golden brown. Transfer cooked muffins to a clean baking sheet.
- Bake: Bake the muffins in the preheated oven for 10-15 minutes to cook through and achieve a nice crust. Remove and let cool before serving.
Notes
- Make sure your water is warm, not hot, to effectively activate the yeast without killing it.
- The dough is quite sticky; dust your hands and surface with flour to handle it more easily.
- Use cornmeal generously on the baking sheet to prevent sticking and add texture to the muffins.
- The skillet step is crucial to develop the signature English muffin crust and nooks and crannies.
- Do not skip the second rise; it makes the muffins light and fluffy inside.
- Leftover muffins can be toasted and stored in an airtight container for up to 3 days or frozen.
- Prep Time: 10 minutes
- Cook Time: 20 minutes
- Category: Breakfast
- Method: Stovetop
- Cuisine: American