
I have to tell you about my absolute favorite guilt-free treat that I reach for whenever I want something indulgent yet healthy: my No Bake Chocolate Peanut Butter Protein Cookies Recipe. These cookies are my go-to snack because they combine rich chocolatey goodness with creamy peanut butter and a protein boost, all without heating up the oven. They come together quickly, taste amazing, and satisfy those cookie cravings while keeping me energized. I love how these cookies balance flavor and nutrition effortlessly.
Why You’ll Love This No Bake Chocolate Peanut Butter Protein Cookies Recipe
What really excites me about this No Bake Chocolate Peanut Butter Protein Cookies Recipe is the beautiful harmony of flavors. The deep cocoa mingles perfectly with the natural sweetness and texture of peanut butter, while the protein powder adds a subtle richness and boosts nutrition. Every bite feels like a treat but without that heavy, overly sugary feeling typical of many desserts. It’s the kind of cookie that makes healthy eating feel like a pure pleasure rather than a compromise.
From my experience, the ease and speed of preparation make this recipe stand out in my kitchen. Because there’s no baking involved, I can whip up these cookies in just about 15 minutes, which is ideal on busy days or when unexpected guests arrive. Plus, chilling rather than baking means less worry about overcooking or drying the cookies out. I often bring these to family picnics, post-workout snacks, or just to keep on hand for quick energy boosts. It’s a versatile recipe that ticks so many boxes for me.
Ingredients You’ll Need

Let me walk you through the simple yet essential ingredients that bring this recipe to life. Each component is carefully chosen to contribute to the perfect taste, texture, and wholesome feel of the cookies.
- Gluten free rolled oats: These provide a hearty, chewy base while keeping the cookies gluten-free and fiber-rich.
- Chocolate protein powder: Adds richness and a boost of protein to keep you full and satisfied.
- Monk fruit syrup (or honey/maple syrup): A natural sweetener that balances the bitterness of cocoa without adding refined sugar.
- Pure vanilla extract: Enhances the overall flavor with a warm, aromatic note.
- Unsweetened vanilla almond milk: Helps to blend the ingredients smoothly while keeping it dairy-free.
- All natural peanut butter: Brings creamy texture, richness, and that classic peanut butter flavor we all love.
- Unsweetened cocoa powder: Delivers deep chocolate intensity without extra sugar or fat.
- Sea salt: Just a pinch to balance and enhance all the flavors perfectly.
Directions
Step 1: In a medium bowl, mix together the rolled oats and chocolate protein powder until well combined. This dry mix forms the base of your cookies and ensures every bite has that protein-packed goodness.
Step 2: In a small saucepan over medium-low heat, combine the almond milk, peanut butter, monk fruit syrup, vanilla extract, sea salt, and cocoa powder. Stir occasionally and heat gently until the mixture is smooth and fully blended together, avoiding any lumps.
Step 3: Pour the warm wet mixture over the dry oat and protein mix. Stir energetically with a spoon until every ingredient is evenly incorporated and the batter has a thick, spreadable consistency.
Step 4: Transfer the bowl to the fridge and chill the mixture for 10 minutes. This rest is key—it firms up the batter so your cookies hold together better later, resulting in that perfect chewy texture.
Step 5: Line a cookie sheet with parchment paper. Using a spoon, scoop out portions of the chilled batter and shape them into your preferred cookie size and shape. I like making them about tablespoon-sized for easy snacking.
Step 6: Place your cookie sheet in the freezer for 10 minutes before serving. This quick chill step helps the cookies set firmly so they don’t fall apart when you pick them up.
Step 7: Enjoy right away or store any leftovers in an airtight container in the fridge to keep the cookies fresh and delicious.
Servings and Timing
This recipe yields approximately 14 cookies, perfect for sharing or saving for multiple snacks throughout the week. The prep time is just about 15 minutes, with no actual cooking involved. After mixing, a 10-minute chilling time in the fridge followed by 10 minutes in the freezer means the total time from start to enjoying is about 35 minutes. These cookies require minimal hands-on time but do need those rest stages to set up just right.
How to Serve This No Bake Chocolate Peanut Butter Protein Cookies Recipe
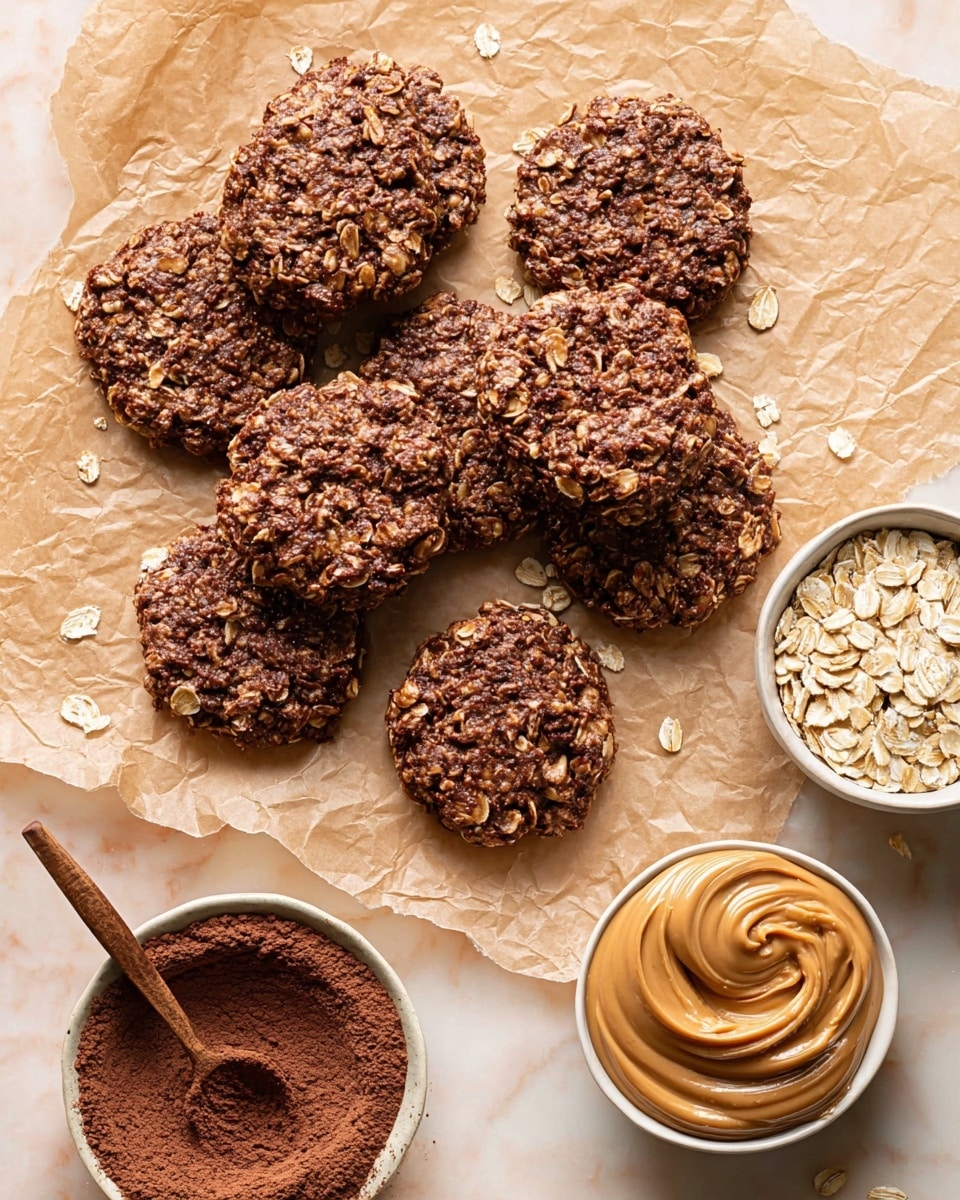
I love serving these cookies chilled or at room temperature because it helps bring out the chewy, fudgy texture I adore. For a fun twist, I sometimes warm one cookie just slightly in the microwave for 5 seconds to get a gooey, soft center that contrasts beautifully with the cool chill of the freezer.
These cookies pair wonderfully with a glass of cold almond milk or a cup of black coffee to balance their sweetness. For a fancy touch at parties, I arrange them on a pretty platter and garnish with a dusting of cocoa powder or a few whole roasted peanuts for crunch and visual appeal. They also make a fantastic protein-packed treat to pack in lunchboxes or enjoy after workouts.
If you want to elevate presentation, try stacking a few cookies with a thin layer of yogurt or nut butter between them for mini cookie sandwiches. I’ve brought these to casual family dinners and always get compliments—they’re a crowd-pleaser without feeling heavy or overly rich.
Variations
One of the reasons I keep making this No Bake Chocolate Peanut Butter Protein Cookies Recipe is because it’s so easily customizable. If you don’t have almond milk on hand, regular milk or oat milk works beautifully as a substitute without compromising texture or flavor. You can swap the peanut butter for almond or cashew butter for a different nutty flair that’s equally delicious.
For a vegan twist, just make sure to choose a plant-based protein powder and stick to sweeteners like maple syrup or monk fruit syrup instead of honey. You can also experiment by adding mix-ins like mini dark chocolate chips, chopped nuts, or shredded coconut to boost texture and flavor complexity.
Feeling adventurous? Try swapping the cocoa powder for carob powder if you want a chocolate alternative with a healthier edge. Or, if you want a little peppermint vibe, add a drop of peppermint extract in place of vanilla for a festive variation that always impresses during holidays.
Storage and Reheating
Storing Leftovers
When I have extra cookies, I store them in an airtight container in the fridge to keep them fresh and chewy for up to one week. Using a glass or BPA-free plastic container with a tight-sealing lid works best to prevent the cookies from drying out or absorbing fridge odors. I often layer parchment paper between rows to avoid sticking.
Freezing
These cookies freeze really well if you want to keep them longer. I place them in a single layer on a baking sheet to freeze solid first, then transfer to a freezer-safe container or zip-top bag. They’ll keep beautifully in the freezer for up to 3 months. When you want a quick treat, simply thaw at room temperature for 10-15 minutes or microwave for a few seconds.
Reheating
To enjoy these at their best, I recommend gentle reheating methods. You can microwave a cookie for 5-8 seconds to soften without melting or use a warm oven (around 250°F) for a few minutes if you want to gently warm several cookies at once. Avoid overheating as it can make the peanut butter oily and change the texture negatively.
FAQs
Can I use regular oats instead of gluten free rolled oats?
Absolutely! Regular rolled oats will work just fine if you don’t have gluten sensitivities. Just make sure to avoid instant oats as they might change the texture since they’re finer and less chewy.
What type of protein powder works best for this recipe?
I find chocolate-flavored whey or plant-based protein powders work best to complement the cocoa and peanut butter flavors. If you use an unflavored powder, consider increasing the cocoa or vanilla extract slightly to boost the taste.
Can I make these cookies nut-free?
Yes, you can substitute the peanut butter with sunflower seed butter or tahini to keep the cookies nut-free. The result will still be delicious and maintain a similar creamy texture thanks to those options.
Are these cookies suitable for people with diabetes?
The recipe uses monk fruit syrup, which is a low glycemic sweetener, making these cookies a better option for many people managing blood sugar. However, it’s important to check personal responses to ingredients and consult with a healthcare provider if unsure.
How firm will the cookies be after chilling and freezing?
The chilling and freezing steps help the cookies firm up to a chewy, slightly soft texture—not hard like traditional baked cookies. If you prefer a softer bite, let them sit at room temperature a few minutes before eating.
Conclusion
I truly hope you give this No Bake Chocolate Peanut Butter Protein Cookies Recipe a try because it’s become such a joyful staple in my kitchen. It’s a deliciously easy way to satisfy your sweet tooth while nourishing your body with wholesome ingredients. Once you try these cookies, I think you’ll feel just as excited as I do every time you reach for one. Happy cookie making!
Print
No Bake Chocolate Peanut Butter Protein Cookies Recipe
These No Bake Chocolate Peanut Butter Protein Cookies are a quick, nutritious snack perfect for on-the-go energy boosts. Made with gluten-free oats, chocolate protein powder, natural peanut butter, and sweetened with monk fruit syrup, they combine rich chocolate and peanut butter flavors without the need for baking. Ready in just 15 minutes, these cookies are ideal for a healthy treat that supports an active lifestyle.
- Total Time: 15 minutes
- Yield: 14 servings
Ingredients
Dry Ingredients
- 2 cups gluten free rolled oats
- 1 scoop chocolate protein powder (about 1/4 cup)
- 2 tbsp unsweetened cocoa powder
- 1/3 tsp sea salt
Wet Ingredients
- 1/2 cup monk fruit syrup (or honey/maple syrup as alternative)
- 1 tsp pure vanilla extract
- 1/3 cup unsweetened vanilla almond milk
- 1/2 cup + 1 tbsp all natural peanut butter
Instructions
- Mix the Dry Ingredients: In a medium bowl, combine the rolled oats and chocolate protein powder. Stir well until the ingredients are evenly mixed.
- Prepare the Wet Ingredients: In a small saucepan over medium-low heat, combine almond milk, peanut butter, syrup, vanilla extract, sea salt, and cocoa powder. Stir occasionally until the mixture is smooth and fully combined.
- Combine Wet and Dry: Pour the warm wet mixture over the dry oats and protein powder mixture. Stir thoroughly with a spoon to evenly incorporate all ingredients.
- Chill the Batter: Transfer the combined mixture to the refrigerator and chill for 10 minutes. This helps the batter firm up for better cookie texture.
- Shape the Cookies: Line a cookie sheet with parchment paper. Spoon dollops of the chilled batter onto the sheet and shape each into your desired cookie size and shape using your hands or a spoon.
- Set the Cookies: Place the cookie sheet in the freezer for about 10 minutes to allow the cookies to firm up and maintain their shape before serving.
- Store Leftovers: Store any remaining cookies in an airtight container in the refrigerator to keep them fresh and maintain their texture.
Notes
- You can substitute monk fruit syrup with honey or maple syrup depending on your preference.
- Using gluten free oats ensures this recipe is gluten free friendly.
- Adjust the sweetness and peanut butter quantity based on your taste and nutritional needs.
- These cookies are best served chilled or slightly frozen for optimal texture.
- Store leftovers in the fridge and consume within 5 days.
- Prep Time: 5 minutes
- Cook Time: 10 minutes
- Category: Snack
- Method: Stovetop
- Cuisine: American
- Diet: Gluten Free


